
George Borke
|
|
6/17/2020 1:10 PM

|
Have you ever googled "how to wash your car the right way?" Well I have. You will be overwhelmed with different techniques and products that all swear to be the best but also often contradict one another. There are guides that swear by South American clay polish, others that say you should never even touch your car and use a foam cannon instead, or that recommend horse hair brushes for your 1995 Corolla. Some methods only have one or two steps, other take nine hours. But what if you are someone who cares about your vehicle, you want to protect it, but you also want a method that is as easy to follow as wax on wax off and supplies professional results time and time again?
Well I've read the articles, watched the youtube videos, browsed other Instructables, and chatted with professional detailers. From all this research, I think I've put together a method for washing your car at home that's thorough, takes care of your car, and is consistent. Now I am NOT saying this is the one and only "right" way to wash your car, but its a method that I follow and have had excellent results by time and time again. Also, there are tons of cleaning products out there that are all similar, but not necessarily equal. The products linked in this Instructable are the ones I've tested and prefer over others.
And for those who are wondering, the vehicle photographed is a 4 year old Tacoma with 65,000 miles that sees mud, salt, snow, dogs, and road trips regularly. I also wash my cars about 10 times a year from March to November, usually every 3-4 weeks or so.
If your paint or clear coat is faded and damaged, this will not bring it back to life. Look into tips for compounding or even respraying to restore your paint, then use this guide to keep it protected and prevent fade and wear.
Step 1: Soaking Your Car and Cleaning Grime Areas
Before you begin, let's consider ideal washing conditions. You should never wash your car in the sun for a few reasons. The first is that you are washing to refinish your protective coat, which means there is a time that your paint may be exposed to direct sunlight and susceptible to greater damage. Another is that a water droplet will act as a magnifying glass and amplify the sunlight to again possibly damage your paint. Lastly, many of the products you may use perform better in cooler temperatures. Ideal washing conditions would be in the shade on a 65-75 F degree day.
The first step to washing your car is thoroughly soaking and spraying it with water from the top down. Always wash from the highest point working your way down from the lowest on any panel so dirt and grime run off your vehicle. For example, I wash in this order on my truck:
>Roof
>Tonneau
>Windshield and Hood
>Front Bumper
>Quarter Panels
>Side Windows and Doors
>Rear Panels
>Tailgate and Rear Bumper
As you spray your car, ensure you get areas where dirt, leaves, and grime builds up. This is commonly in your wheel arches, rocker panels, windshield cowl, gaps between doors or panels, or even the fuel filler cap pocket and lid. On my truck, the seam around the rear windows builds up dirt and drips an annoying streak when dirty. I personally don't use a power washer, but I do use a pressurized hose spray nozzle. I also recommend you use a sprayer that has a twist or rotating trigger rather than a squeeze trigger so you don't spray yourself in the face every time you drop the hose on the ground.
Step 2: The Pre-wash
After soaking your vehicle, the next step is a prewash. This includes using a gel wash to remove any bugs or tar and scrubbing your rims to remove any brake dust. For the prewash, you will need a bucket filled with just water. I also highly recommend that you put a grit trap in each bucket you use to wash your car. This will trap bugs and grime under the guard as you wring our your sponges keeping it off your paint.
First spray Rain-X Bug and Tar Gel on all areas that collect bugs and tar regularly. This typically includes your hood, front bumper, fender flares, rocker panels, and behind your tires. Give the bug and tar 5 minutes to soak in, you will see it start to ooze off your panels taking all the grim with it. Use a wet mesh sponge to work the bug and tar areas removing all grime on your bumpers. Wring out the sponge regularly in your bucket of water as you clean your panels. Once scrubbed, re-soak your car washing off all left over gel and grime. Remember to spray from the top down.
For your rims, use Meguiar's Ultimate All-Wheel Cleaner and Mother's rubberized wheel brush. After wetting your rims, spray a heavy and even coat of the rim cleaner on each rim. Let the cleaner soak in for 3-5 minutes, then scrub each rim with the wet wheel brush. Ensure you get in all the seams and gaps of your rims, rinsing and rewetting the brush in-between each rim. After scrubbing the rims, wash off the soap and grime. The reason I wash rims in this step is so that any brake dust that may find its way onto your paint will be removed in the following steps.
Before moving onto the next step, dump, clean, and refill the bucket with fresh water. This bucket will become the "dirty" bucket in the washing step.
Step 3: Soap and Water Scrub
This step is the most "car wash-y" of all the steps in the whole process. After the prewash, ensure your car is wet and all bug and tar gel is washed off. I recommend the two-bucket method, one is your "clean" bucket with soap and the other is your "dirty" bucket with just water. Both buckets should have a grit guard (shown below). Before ever putting your sponge in the clean bucket, first wring it out in the dirty bucket to remove any grime from washing your panels. You also want to avoid dropping your sponge on the ground.....obviously.
 
I prefer turtle wax soap over others as I find that works really well with ease. Following the instructions for how much soap per gallon, add soap to your clean bucket and fill with water by spraying the surface to aerate the soap and keep it nice a sudsy.
Now using a microfiber cleaning sponge, dip the sponge in your clean bucket, wash a panel of your car using a thorough circular motion, wring out the sponge in your dirty bucket, and repeat! You may need to wring out and re-soap your sponge multiple times per panel depending on its size.
Again, clean your car from the top down, I use the same order of panels as mentioned in the first step. Do not let the soap sit on a panel. After scrubbing each panel, wash off the soap with your hose before moving onto the next one. I also usually dump and refill the dirty bucket half way through washing my car.
Step 4: Drying
The next step is to dry your car, and quickly too! Using a shammy towel, thoroughly dry off your vehicle removing any water and drying out spots that are prone to drips.
Drying is a crucial step because leaving water droplets on your paint increases the likely hood of damaging it, leaving spots, or collecting pollen all before you've put down some protection. Your car also needs to be completely dry before moving onto the next steps, and a rogue drip could be catastrophic.
Step 5: Optional: Scratch Repair
This step is optional, now would be the time to repair any surface scratches before moving onto the next step. Using a Scratch Repairer and a fresh microfiber cloth, work out any scratches by squeezing some of the scratch repair out onto the cloth, then buffing the area scratched area in a circular motion.
After working out any scratches, use a fresh microfiber to wipe off any excess scratch repair left on your paint before moving on to the next step.
Step 6: Wax
Washing your car and not waxing it is a complete waste of effort. Waxing your car provides a protective coat over your paint to keep it safe from the elements. It also keeps your car clean for longer as water will bead up and all pollen and grime will easily run off in rain or as you drive. I personally alternate between using a paste wax and a spray-on wax every other wash. As with any step of this process, wax should be applied in the shade or even indoors if possible.
Applying a Paste Wax - Using an applicator sponge and a Turtle Wax paste finishing wax, work through applying the wax one panel at a time. Dip the sponge into the wax, then apply an even coat on a panel of your vehicle by spreading it in a tight, small, circular pattern across the panel. Re-dip the sponge into the wax as it runs dry. Less is more. Do not over apply the wax, all you need is an even coat. More wax just means more work, not more protection. Avoid putting paste wax on windows or trim as it is more difficult to get off. Let the wax sit on a panel for 3-7 minutes, or until it starts to turn white and harden. Then using a fresh microfiber cloth, aggressively buff off the excess wax in a circular motion. Do not let the wax stay on your panel for too long or else it will be far more difficult to remove. I usually wax one or two panels at a time, then buff, and then move on to the next two.
Applying a Spray Wax - Meguiar's Quik Detailer is quick and easy to apply, but usually less protective than a paste wax. I like applying spray waxes every other wash as the paste wax still isn't worn off between two or three washes. To apply, spray an even coat of wax on a panel of your vehicle, then buff off in an aggressive circular motion using a microfiber cloth. You don't need to worry about getting spray waxes on your trim, I actually use spray waxes to wax over my trim each wash but not until after the next step.
WAX ALTERNATIVE:
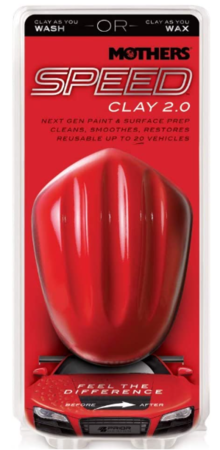
Wash as instructed, use MOTHER'S SYNTHETIC CLAYBAR followed by MOTHER'S CMX CERAMIC COATING. Easier than natural claybar and the ceramic coating is THE BEST!!
Step 7: Trim, Tires, and Tops
Depending on your vehicle and personal preferences, this step applies conditioner and care products to the trim, tires, or soft top of your vehicle.
For Black Trim - Apply Mother's Back-to-Black by squeezing a small amount onto a fresh microfiber cloth, then work it onto the black trim of your vehicle by evenly spreading throughout. Keep a fresh microfiber on hand to clean any over spray on your paint as you apply the trim conditioner.

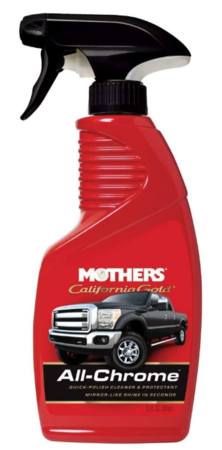
For Chrome Trim - Apply Mother's All-Chrome by spraying a small amount onto a fresh microfiber cloth, then work it onto the chrome trim of your vehicle by evenly spreading throughout. Keep a fresh microfiber on hand to clean any over spray on your paint as you apply the trim conditioner. After cleaning the trim, I apply a spray on wax over the trim to keep it protected and clean.
For Tire Shine - Spray an even coat of Armor All Tire Shine onto your tires. Keep a fresh microfiber on hand to clean any over spray on your paint as you
apply the tire conditioner. Do not scrub or wipe the tire shine, all drips will dry evenly if an even coat is applied. Wipe drips o your rims with a cloth, but not the same cloth you have been using to keep your paint clean. An inexpensive alternative is LEMON PLEDGE. Yes, it actually works quite well.
Optional: Convertible Tops - If you own a convertible, now would be the time to apply a conditioner to thoroughly clean and protect your soft top. I use Mother's VLR for my car with a vinyl soft top, and I've heard good things about Raggtopp for fabric or canvas tops. For either cleaner, evenly spray and
work the cleaner over your top using a clean microber cloth or scrubbing brush. Keep a fresh microfiber on hand to clean any over spray on your
paint as you apply the top cleaner.

Step 8: Interior Detailing - For the interior, there are a few steps and products you can use to keep your interior looking brand new.
Carpets and Floor Mats - I use a mini shop vac to vacuum all carpets and seams in seats or trim, then Shout Automotive and brush for carpets. For allseason rubber floor mats, I remove them from the vehicle and clean them using carwash soap and water.
Seats and Headliners - After vacuuming out any seams, I clean my cloth seats and headliner with the same Shout Automotive as the carpets. After spraying, I let the cleaner soak in for a few minutes, then scrub with a fresh cloth. For my vehicles with vinyl seats, I use Mother's VLR for vinyl and leather using the same method as cloth seats. After everything dries, apply a fresh coat of Scotchgard on fabrics that see extensive wear or are susceptible to coffee spills.
 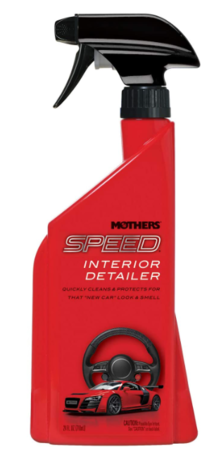
Dash, Trim, and Sills - I use Meguiar's Quik Interior Detailer on the dash, cupholder, every trim piece, door panels, and sills. It leaves a satin new car finish every time. To apply, spray a liberal coat onto your dash and wipe away excess cleaner with a fresh microfiber cloth.
Step 9: Windows and Mirrors
The reason I wait this late to clean the windows and mirrors is because over spray from other steps often get on the windows during throughout process. For cleaning your windows, make sure you use an automotive glass cleaner as regular in house cleaners often have ammonia which will damage any window tint your vehicle has. I use blue shop paper towels and the following steps to clean windows streak-free.
1. Spray glass cleaner on the window or mirror
2. Using a damp paper shop towel, wipe and spread the cleaner across the surface
3. Using a dry paper shop towel, aggressively buff the remaining cleaner to remove all excess and streaks

Step 10: The Walk-Around
Your hard work is done! Take a step back and enjoy the glory of your clean vehicle. Actually, walk around your vehicle with a fresh microfier cloth and inspect it for patches of dry wax and any spots you may have missed along the way. As previously mentioned, this is not the one, perfect, single "right" way to wash your car, or the only products out there, but a collection of techniques in order to provide professional quality results with ease. I hope this Instructable helps and guides you in your own automotive care.
Thanks for reading, happy cleaning!
Download a pdf version of this guide: washing your car the right way (instructables)
|
|
|
|